Are you a big fan of geometric vintage quilts? Perhaps you even own a cherished example that you’d love to display or use, but it is too fragile. You can copy your treasure or use other gems of the past as inspiration for a Sashing Stash project.
Here is how I went about recreating a stunning antique quilt that used many traditional graphic banding motifs. I invite you to adapt my process to your needs as you conjure your own design.
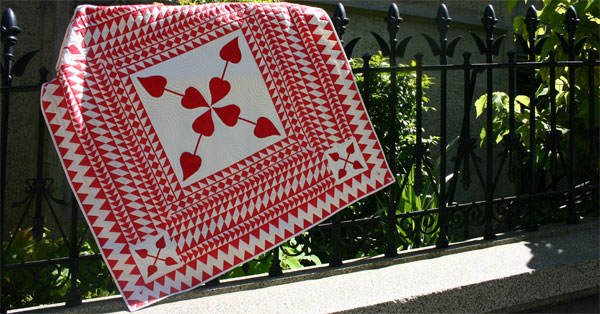
My Adaptation of the St. Valentine’s Patch Quilt
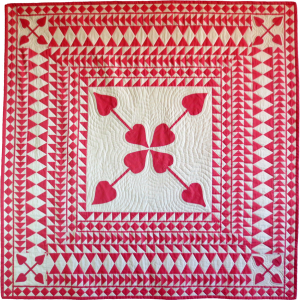
This tutorial starts with a story. In March 2011, a landmark and breathtaking display of 650 vintage red and white quilts, all from the personal collection of Joanna S. Rose, was held at the Park Avenue Armory in New York City, sponsored by the American Museum of Folk Art.
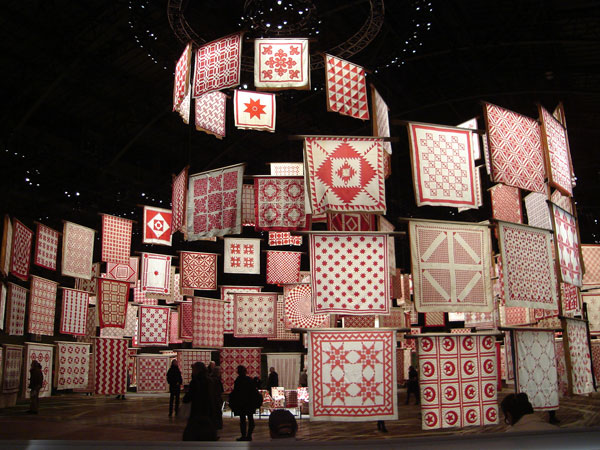
Photo by Jill Coogan
Some of the show announcements had a photo showing a fascinating geometric quilt that just hollered for me to recreate it using Sashing Stash.
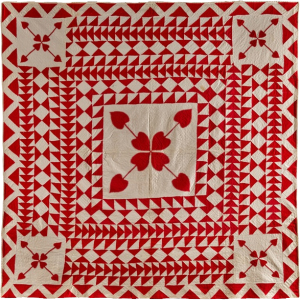
St. Valentine’s Patch Quilt, Artist Unidentified, USA 1860–1880
Now, some of you, like my colleague, graphic artist Ann Marra, can design using computer software, but I, alas, am of the old school. I scribble my design ideas on the backs of envelopes and use graph paper to lay them out.
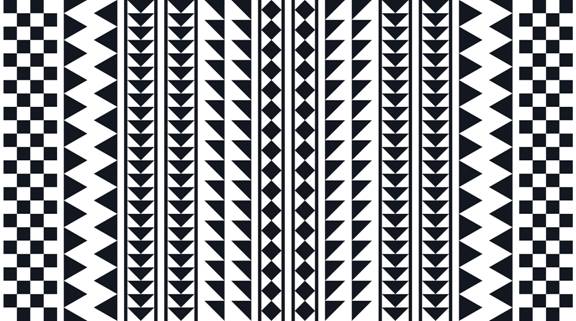
24 Inches of Sashing Stash Focus Fabric
To start a construction drawing for this red and white medallion quilt, I printed out several paper copies of the black and white Sashing Stash focus fabric (above) and sat down with scratch paper, scissors, and glue. (Click on the image above or this link, and in the resulting new window, select the image and copy it. You can enlarge it by pasting it into a Word file and pulling the corners outward diagonally.)
I cut the printed pattern bands into rows and began constructing around a central square, laying row after row building outward.
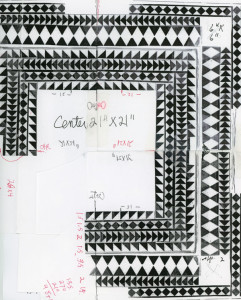 The center square in the original quilt was bordered by 8 half-square triangles which, based on Sashing Stash’s measurements (8″ x 1.5″) would have been very small, only 12 inches! So I abandoned that relationship and instead figured I wanted a finished quilt approximately 42″ x 42″ and scaled accordingly. The result of my cutting and gluing was the crude paste-up shown above.

Large Diamond Reconstruction
Note that I made the largest diamonds by separating the two rows of equilateral triangles in the focus fabric, sliding them over half a figure, and reconstructing them as shown in the diagram.
First Replica Version
For what turned out to be the first version of this vintage masterpiece, Dani Lawler followed my diagram, building the replica quilt from the inside out on a design board. There wasn’t enough of some motifs available, so—exactly as our 19th century foremothers would have done—we had to be creative in some rows. For example, Dani replaced the large outer square-on-point bands in the original with diamonds constructed using the two rows of equilateral triangles (as shown in the diagram above).
First Sashing Stash Version
She cut the leaf/heart shapes from paper and pinned them in place to judge the best size. Finally, she exquisitely quilted the finished top with “stitch in-the-ditch.” (That’s where you stitch exactly on the seam line for a sculptural look, rather than noticing the thread and stitches.) Alternately, she did “echo quilting” around the leaf shapes on the solid off-white fabric, a technique that emphasizes the importance of the thread and stitches.
The Second Version
After the first replica quilt was finished, I received more pre-production samples of Sashing Stash, so we decided to try a second version of the red and white medallion quilt.

Second Sashing Stash Version
For Quilt Two, Dani chose to use the Bolt of Lightning bands (two adjacent rows of Equilateral Triangles as shown in the focus fabric). This meant she had no triangles left to make the diamond rows used in Quilt One. She chose instead to create tilted diamonds, pairing side by side rows of Half-Square Triangles. She slightly changed the proportions and the leaf/heart appliqués.
St. Valentine’s Patch Quilt, Artist Unidentified, USA 1860–1880
Here, to compare and contrast, are the original 19th century quilt, and the two different Sashing Stash recreations.
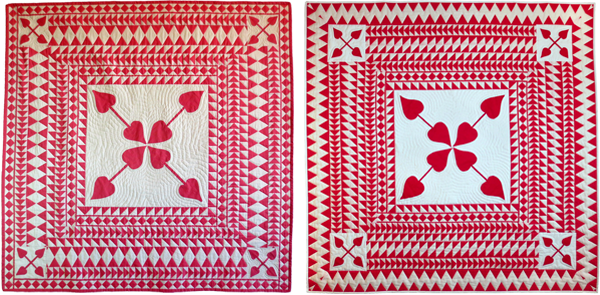
First and Second Sashing Stash Versions (left to right)
Recreating Your Own Vintage Quilts
You may have sets of antique blocks or a portion of a period top that you would like to finish with Sashing Stash, either to use or display. To choose companion borders and strips, I suggest “auditioning” Sashing Stash using a method somewhat like the paper strips I used for recreating the red and white medallion quilt. Think of this as similar to the method that people use to audition frames in framing shops, alternately setting those L-shaped corners against their art piece.
You can audition Sashing Stash in person, laying the folded or cut strips against your existing unit. (However, if you have the focus fabric in only one colorway, this may limit your ability to visualize a result in one of the two other colorways. Try the strips singly and together as internal sashing or borders or both until you get just the right balance for your original piece. If none of the basic Sashing Stash colors is quite right for your project, check out our information on overdyeing to see the many color variations available to you.